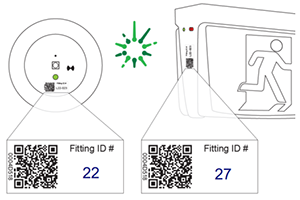
When installing each Emergency light and exit sign, ensure the QR code label provided with each luminaire is fixed in a visible location. Then add a Fitting ID number for reference against the site plan and register
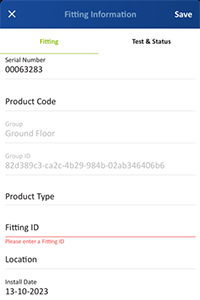
Option 1 – Mobile Device Scan the QR code of each fitting and enter the details
Press “Add Fitting” to add a new fitting to the register.
Choose the “Scan Fitting” button to open the camera and scan the QR code on each fitting. The Product code will populate automatically via the serial number. Enter the Fitting ID, location and other details as required. Save and repeat the process for all other fittings
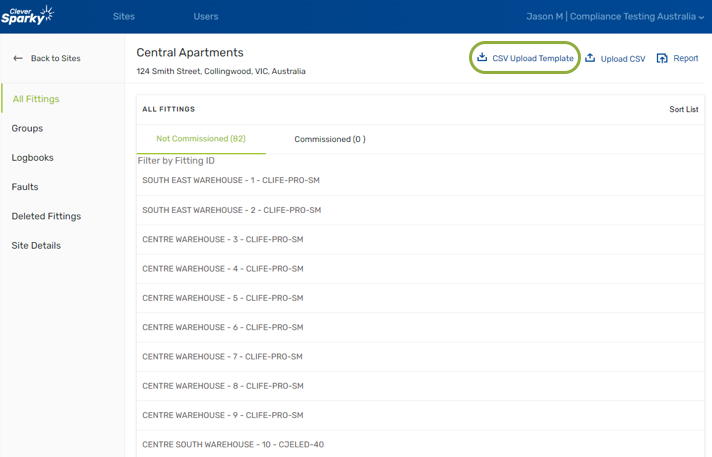
Option 2 – CleverSparky on PC Download the Excel template from your site page and upload the fitting register in bulk